 novityinfo
7 Best Tools to Reduce Video Noise and Enhance Clarity
Advertisement
A professionally captured scene can become unmanageable during editing because of video noise contamination. All picture quality standards demand absolute clarity because professional filmmakers and home video makers and content creators share this requirement. The market offers exceptional software options which help eliminate video noise and enhance the appearance of your footages. The guide presents seven powerful video noise reduction tools together with distinct capabilities for handling different user requirements and proficiency levels.
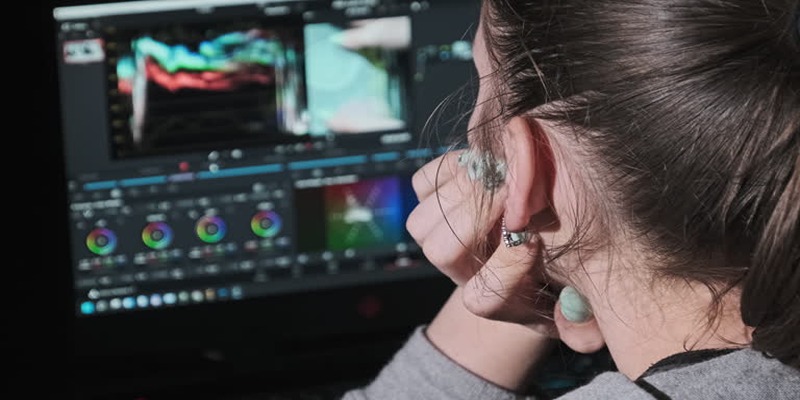
1. Adobe Premiere Pro
For professionals, Adobe Premiere Pro is a go-to video editing platform loaded with powerful tools, including noise reduction features.
How to Use Noise Reduction in Adobe Premiere Pro
- Import your video clip into Adobe Premiere Pro.
- Select the clip in the timeline and go to the Effects Controls panel.
- Under Basic Correction, find the option for Noise Reduction and adjust the slider until you achieve your desired level of noise reduction.
- Play back your video to see if there are any remaining areas with noticeable noise, and make further adjustments as needed.
2. DaVinci Resolve Studio

DaVinci Resolve Studio, often lauded for its color correction capabilities, also excels at reducing video noise.
How to Use Noise Reduction in DaVinci Resolve Studio
- Import your video clip into DaVinci Resolve Studio.
- In the Color tab, navigate to the OpenFX panel and select ResolveFX Noise Reduction from the dropdown menu.
- In the pop-up window, adjust the Strength, Spatial Threshold, and Temporal Threshold sliders until you achieve your desired level of noise reduction.
- Play back your video to see if there are any remaining areas with noticeable noise, and make further adjustments as needed.
3. Neat Video
Neat Video is a highly specialized noise reduction plugin compatible with multiple video editing platforms, including Premiere Pro, Final Cut Pro, and After Effects.
How to Use Neat Video
- Install Neat Video on your computer and open it in your video editing program.
- Import the video clip you wish to apply noise reduction to into your timeline.
- Select the clip and navigate to the Neat Video plugin.
- In the plugin window, select Auto Profile to automatically detect and build a profile for noise reduction or manually adjust settings by selecting Build Noise Profile and using a sample frame from your footage as a reference.
- Once the profile is built, adjust the Noise Reduction Amount slider until you achieve your desired level of noise reduction.
- If necessary, use additional features such as Temporal Smoothing or Sharpening to
4. Final Cut Pro X
Apple’s Final Cut Pro X is another excellent choice for Mac users looking to reduce noise and enhance video clarity.
How to Reduce Noise in Final Cut Pro X
- Open your project in Final Cut Pro X and select the clip you want to work on in the timeline.
- Navigate to the Effects Browser by clicking on the effects icon in the bottom-right corner of the workspace.
- Search for the Noise Reduction effect, or browse under the Video Effects category to locate it.
- Drag and drop the Noise Reduction effect onto your selected clip in the timeline.
- Once applied, go to the Inspector panel to customize the effect. Adjust the Amount slider to control the intensity of the noise reduction applied to your clip.
- Fine-tune additional settings such as Sharpness or Detail Preservation to ensure optimal video quality while minimizing noise.
- Preview the changes in the viewer and make adjustments as needed to achieve the desired clarity and sharpness.
5. Topaz Video AI
Topaz Labs’ Video AI software combines noise reduction with cutting-edge artificial intelligence to elevate video quality.
How to Use Topaz Video AI
- First, download and install the Topaz Video AI software on your computer.
- Open the program and import your video clip.
- Click on the DeNoise tab to begin reducing noise in your video.
- Adjust the slider under Remove Noise until you achieve a satisfactory level of noise reduction.
- Fine-tune additional settings such as Enhance Sharpness or Recover Detail to further enhance video quality while minimizing noise.
- Preview the changes in the viewer and make adjustments as needed to achieve the desired clarity and sharpness.
- Once satisfied with the results, click on Apply to save your changes.
6. Movavi Video Editor Plus

Movavi Video Editor Plus is a beginner-friendly tool with easy-to-apply noise removal features.
How to Remove Noise Using Movavi Video Editor Plus
- Open Movavi Video Editor Plus and import your video by clicking on the Add Files button or dragging and dropping the file into the editor.
- Drag your video to the timeline at the bottom of the screen to begin editing.
- Click on the Audio Properties option in the toolbar above the timeline.
- Locate the Noise Removal feature and toggle it on to enable.
- Adjust the Noise Removal slider to your desired level of noise reduction. You can preview the changes in real time by clicking on the play button in the player at the top of the screen.
- If needed, you can also use other audio editing tools such as Equalizer, Volume Adjustment and Audio Effects to further enhance your audio quality.
- Once you are satisfied with the results, click on the Export button to save your edited video with reduced background noise.
7. VEED.IO
Looking for an online tool? VEED.IO offers browser-based video editing tools, including noise reduction.
How to Use VEED.IO for Noise Reduction
- Open your browser and visit the VEED.IO website.
- Upload your video by clicking on the Upload Your File button or dragging and dropping the file directly onto the platform.
- Once your video has been uploaded, locate the Audio Tools option in the menu.
- Select the Background Noise Removal feature. VEED.IO will automatically begin analyzing and reducing unwanted background noise in your audio.
- If desired, you can make further adjustments using additional tools, such as volume control or equalizer settings, to refine the audio quality.
- Preview your video by using the built-in player to ensure the noise reduction meets your expectations.
- When satisfied with the result, click on the Export button to download your edited video with improved audio clarity.
Conclusion
Clean, clear, and professional-looking footage is within your reach using the right tools to reduce video noise. Whether you’re editing cinematic content, social media videos, or tutorials, these tools can transform your visuals. From AI-powered software to user-friendly platforms, there’s something on this list for everyone. Try one today and watch your videos shine like never before.
On this page
1. Adobe Premiere Pro How to Use Noise Reduction in Adobe Premiere Pro 2. DaVinci Resolve Studio How to Use Noise Reduction in DaVinci Resolve Studio 3. Neat Video How to Use Neat Video 4. Final Cut Pro X How to Reduce Noise in Final Cut Pro X 5. Topaz Video AI How to Use Topaz Video AI 6. Movavi Video Editor Plus How to Remove Noise Using Movavi Video Editor Plus 7. VEED.IO How to Use VEED.IO for Noise Reduction ConclusionAdvertisement
Related Articles
How to Edit Vertical Videos in iMovie: Step-by-Step Tutorial

6 Best Tools to Create Stunning Animated Videos with Ease

Top 5 Free Video Enhancers to Instantly Boost Video Quality

Simple Steps to Fix Pixelated and Grainy Videos on Windows
How to Convert MKV to WMV Quickly and for Free

Best DAV File Players to Watch Encrypted Videos on Your PC

Steam Client Update Released to Fix DLC Issues and Improve Stability

6 Best Platforms to Watch Anime and Cartoons Without an Account

Step-by-Step Guide to Making a Boomerang Video on Snapchat

Discover the 7 Best Gmail Alternatives in 2025 to Boost Your Email Game

The 8 Best Free Photo Editors in 2025 That Rival Photoshop
