5 Best Tools to Record High-Quality Valorant Clips Effortlessly
Advertisement
Capturing every clutch moment, ace, or jaw-dropping flick shot in Valorant is a must for any player wanting to relive the glory or share their skills with the gaming community. Whether you’re grinding to Immortal or just playing casually with friends, recording your Valorant clips can transform your gameplay highlights into valuable memories, viral videos, or even a portfolio for content creation.
Why Is Recording Valorant Clips Important?
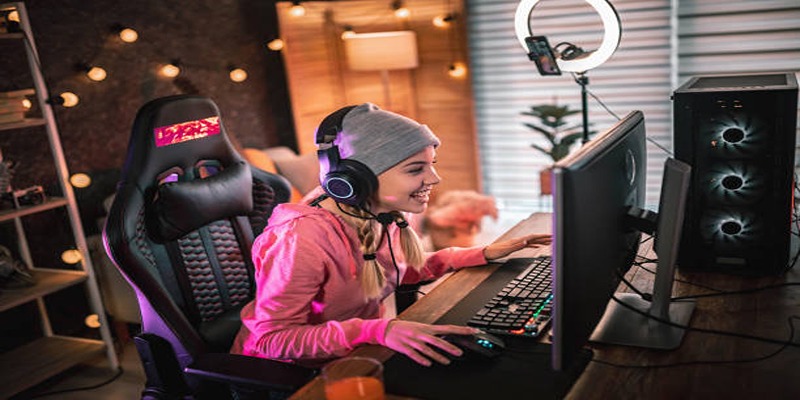
Recording clips isn’t just for bragging rights (though that’s a great perk). Here’s why many players record their Valorant moments:
- Content Creation: Many gamers use recorded clips to build YouTube montages, TikTok highlights, or Twitch streams.
- Gameplay Review: Watching your clips back can help you analyze mistakes, improve decision-making, and see what worked when clutching rounds.
- Sharing with Friends/Community: Sometimes, you just want to share that insane 1v5 ace with your squad or gaming community.
- Portfolio Creation: For players aspiring to go pro or join organizations, a high-quality video portfolio is a fantastic way to showcase skills.
1. OBS Studio
OBS Studio (Open Broadcaster Software) continues to be one of the most trusted tools for both recording and live streaming. Its open-source nature means it’s completely free, but don’t confuse “free” with “cheap.” OBS Studio is loaded with professional-grade features that help you capture smooth, high-resolution footage at no cost.
Features:
- Supports customizable settings for resolution, bitrate, and frame rate.
- Allows you to record Valorant clips in Full HD or even 4K.
- Offers multi-source recording, such as adding overlays for your webcam or microphone input.
- Uses optimized performance settings to minimize game lag.
Steps to Record Valorant Clips with OBS Studio:
- Download and install OBS Studio from the official website.
- Open OBS Studio and click on Settings to configure your recording preferences.
- Set the resolution, frame rate, and bitrate according to your desired quality.
- Add a new source by clicking the + under the Sources box and select Game Capture.
- Configure the Game Capture settings to capture Valorant specifically.
- Click Start Recording when you're ready to begin capturing your gameplay.
- Press Stop Recording once you're done, and the clip will be saved to your designated folder.
2. NVIDIA ShadowPlay
If you have an NVIDIA graphics card, ShadowPlay is likely your easiest and most seamless recording option. Built directly into the GeForce Experience app, this minimalist tool lets you record effortlessly without extra software downloads.
Features:
- Instant replay mode to capture the last 30 seconds of gameplay with a single button.
- Ultra-low performance impact, ensuring no frame drops while you play.
- Allows recording up to 4K resolution with HDR.
- Includes direct integration with social platforms for instant clip sharing.
Steps to Start Recording with ShadowPlay:
- Open the GeForce Experience app and ensure it's up to date.
- Go to the "Settings" menu and enable the Overlay feature.
- Press Alt + Z to open the overlay and access the recording options.
- Select "Record" and customize your recording preferences, such as resolution and quality.
- Click "Start" to begin recording your gameplay seamlessly.
3. Medal.tv
Medal.tv is purpose-built for creating and sharing short gaming clips, making it perfect for those epic Valorant plays. With this tool, you don’t need to record your entire game; instead, you can capture just the highlights you care about.
Features:
- Automatically trims your clips to the last 15, 30, or 60 seconds (or more).
- Cloud storage ensures you never lose a great clip.
- Includes built-in editing tools for trimming and adding effects.
- Easily share clips on Discord, TikTok, or Twitter right from the app.
Steps to Get Started:
- Download and install the app from the official website.
- Launch the app and log in or create an account.
- Customize your recording settings based on your preferences.
- Start playing your game, and use the app to capture your highlights!
4. Xbox Game Bar
If you’re running Windows 10 or 11, you already have this hidden gem installed! Xbox Game Bar is Microsoft’s built-in game recording tool, perfect for players who want simplicity with no need for additional software.
Features:
- Instant gameplay recording with a single shortcut (Windows Key + G).
- Lightweight and easy to use, with minimal impact on FPS.
- Built-in audio controls allow you to separate mic and game audio.
Steps to Record Gameplay with Xbox Game Bar
- Press the Windows Key + G to open the Xbox Game Bar overlay.
- Click on the Capture widget, usually found at the top of the overlay.
- Press the Record button (circle icon) to start capturing your gameplay.
- Once you’re done, press the Stop Recording button or use the shortcut Windows Key + Alt + R.
- Your recording will be saved automatically in the Videos > Captures folder.
5. Bandicam

Bandicam is a versatile video capture tool loved by gamers for its high-quality recordings and unique features like ultra-compression. It’s capable of capturing individual gameplay clips or entire screens with stunning clarity.
Features:
- Records in Full HD and Ultra HD at up to 120 FPS.
- Offers real-time drawing features, allowing you to annotate footage while recording.
- Compresses recordings without sacrificing quality, saving space on your hard drive.
- Can record external devices (such as webcams or consoles) along with gameplay.
Steps to Use Bandicam
- Download and Install Bandicam
- Run Bandicam and choose the primary recording mode (Game Recording, Screen Recording, or Device Recording)
- Configure settings such as video resolution, FPS, and audio options.
- Choose your desired output folder for recorded files.
- Start recording by clicking on the "Record" button or pressing a hotkey.
- Use the real-time drawing features to annotate footage while recording.
- Stop recording by clicking on the "Stop" button or pressing a hotkey.
- Access your recordings in the designated output folder.
Which Recording Tool Should You Choose?
The best choice depends on your recording needs and technical preferences:
- If you want maximum customization and professional-grade recordings, go with OBS Studio.
- For quick, high-quality captures with zero setup, NVIDIA ShadowPlay is unbeatable.
- Casual gamers and short-highlight creators should consider Medal.tv.
- Prefer built-in tools? Xbox Game Bar is a no-brainer.
- Need compressed, high-quality recordings? Bandicam is the ultimate solution.
Conclusion
Whether you’re looking to analyze your plays, develop a killer montage, or just share some fun moments with friends, these tools make recording Valorant clips simple and effortless. Each offers its own unique strengths, so choose the one that fits your specific needs. Now, grab one of these tools, load up Valorant, and get ready to relive your slickest, most clutch-worthy moments.
On this page
Why Is Recording Valorant Clips Important? 1. OBS Studio Features: Steps to Record Valorant Clips with OBS Studio: 2. NVIDIA ShadowPlay Features: Steps to Start Recording with ShadowPlay: 3. Medal.tv Features: Steps to Get Started: 4. Xbox Game Bar Features: Steps to Record Gameplay with Xbox Game Bar 5. Bandicam Features: Steps to Use Bandicam Which Recording Tool Should You Choose? ConclusionAdvertisement
Related Articles

Step-by-Step Guide to Making a Boomerang Video on Snapchat

5 Best 4K UHD Media Players for Windows PC and Mac in 2025

The 6 Best Payment Processing Platforms in 2025 for Smooth, Secure Transactions

What Makes Generative AI by Getty Images The Best AI Image Generator for Businesses?
Steam Client Update Released to Fix DLC Issues and Improve Stability

Which Is Better for Compression? A Closer Look at H.264 and H.265
Best Tools to Compress Videos for Discord Effortlessly

How to Convert M3U8 to MP4 Using VLC and Other Tools

The 6 Best Jira Alternatives in 2025 to Streamline Your Workflow

6 Best Tools to Create Stunning Animated Videos with Ease

The Best Webinar Software for Marketers in 2025 to Grow Your Audience and ROI

 novityinfo